

Create Workflow from Template
Workflow Definitions are visual state machines that automate your clinic's patient journey. Creating a workflow from a pre-built template allows you to deploy a fully configured, production-ready care pipeline with pre-configured states, transitions, and automation actions in minutes.
This guide walks you through finding the workflow dashboard, selecting a template, configuring its integration settings, and launching your new workflow.
Detailed Step-by-Step Guide
Step 1: Access the Dashboard via Global Search
Instead of navigating the menus manually, you can quickly find the Workflow Definitions dashboard using the global search interface:
- Log in to the Mazecare OS dashboard.
- Click the Global Search input box in the top-center navigation bar, or press the Cmd + K (Mac) or Ctrl + K (Windows/Linux) keyboard keys to focus the search field instantly.
- Type
workorworkflowin the search bar. - Under the Settings category, click on Workflow Definitions to navigate to the page.
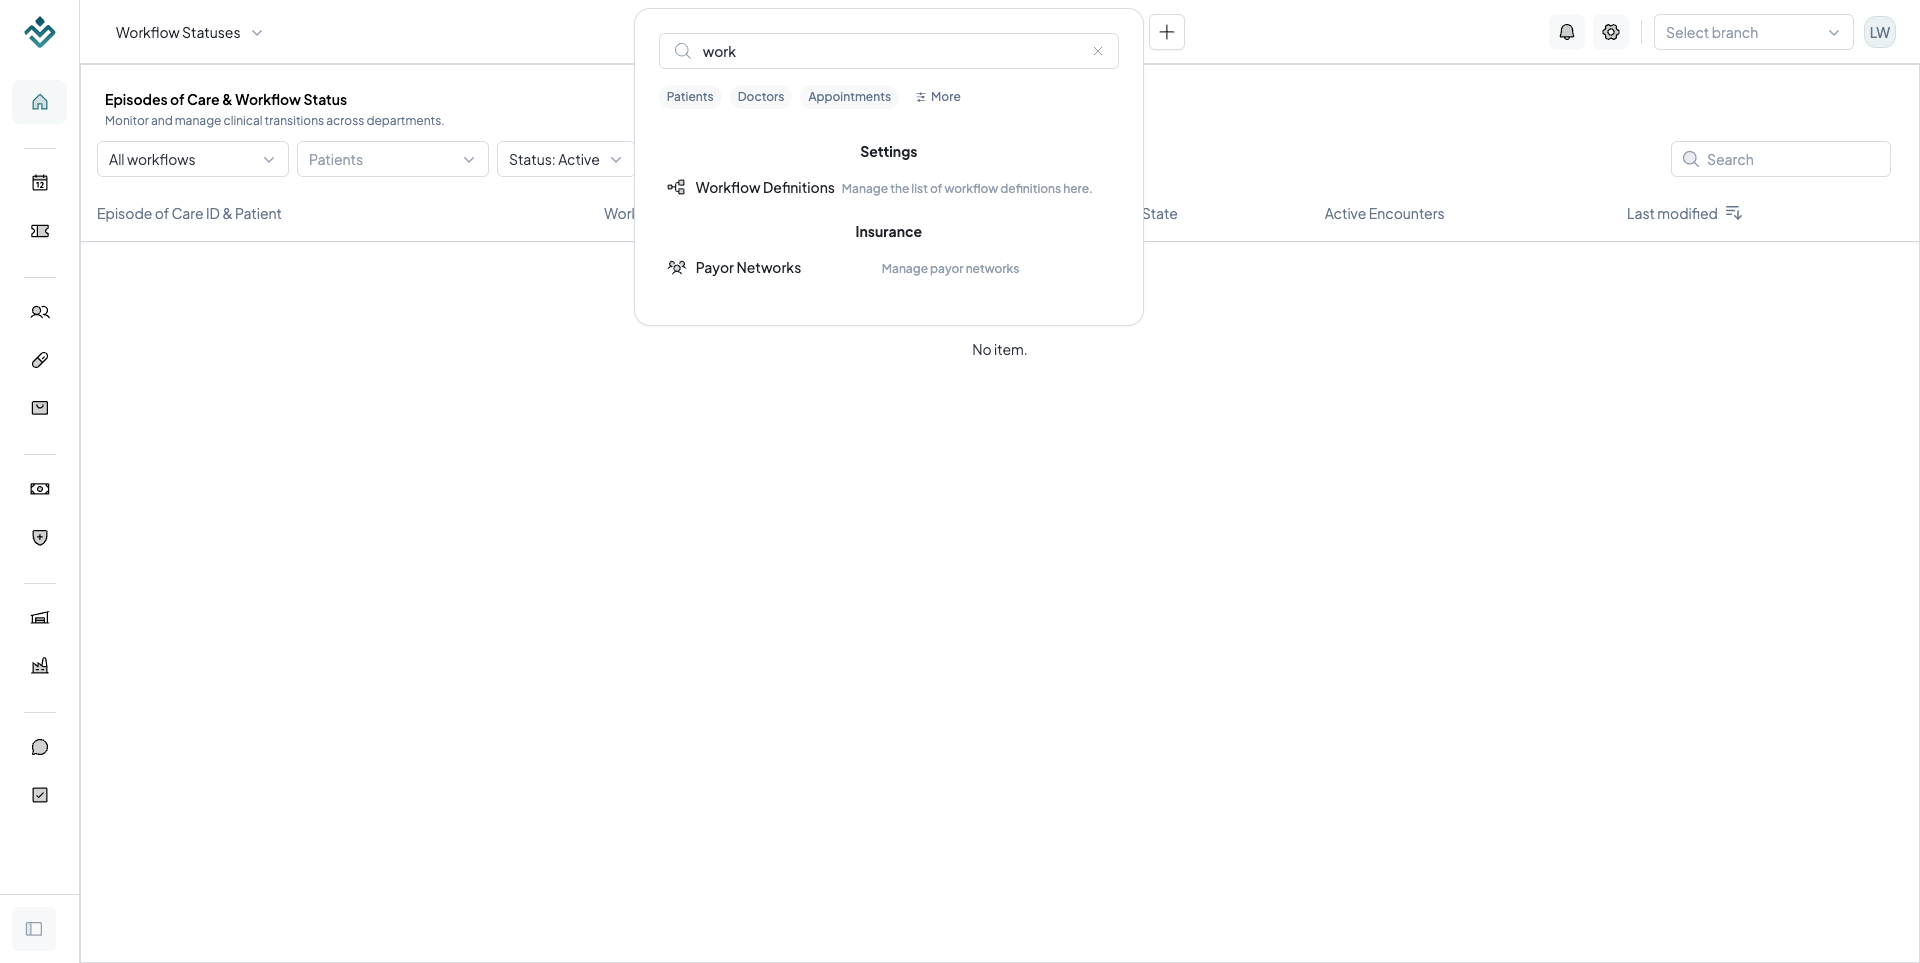
Step 2: Open the Workflow Creation Wizard
From the Workflow Definitions page, you can view existing workflows and initiate the creation of a new one:
- On the Workflow Definitions page, click the + New Workflow Definition button located in the top-right corner.
- A Create Workflow Definition modal will appear in the center of the screen, offering multiple creation paths.
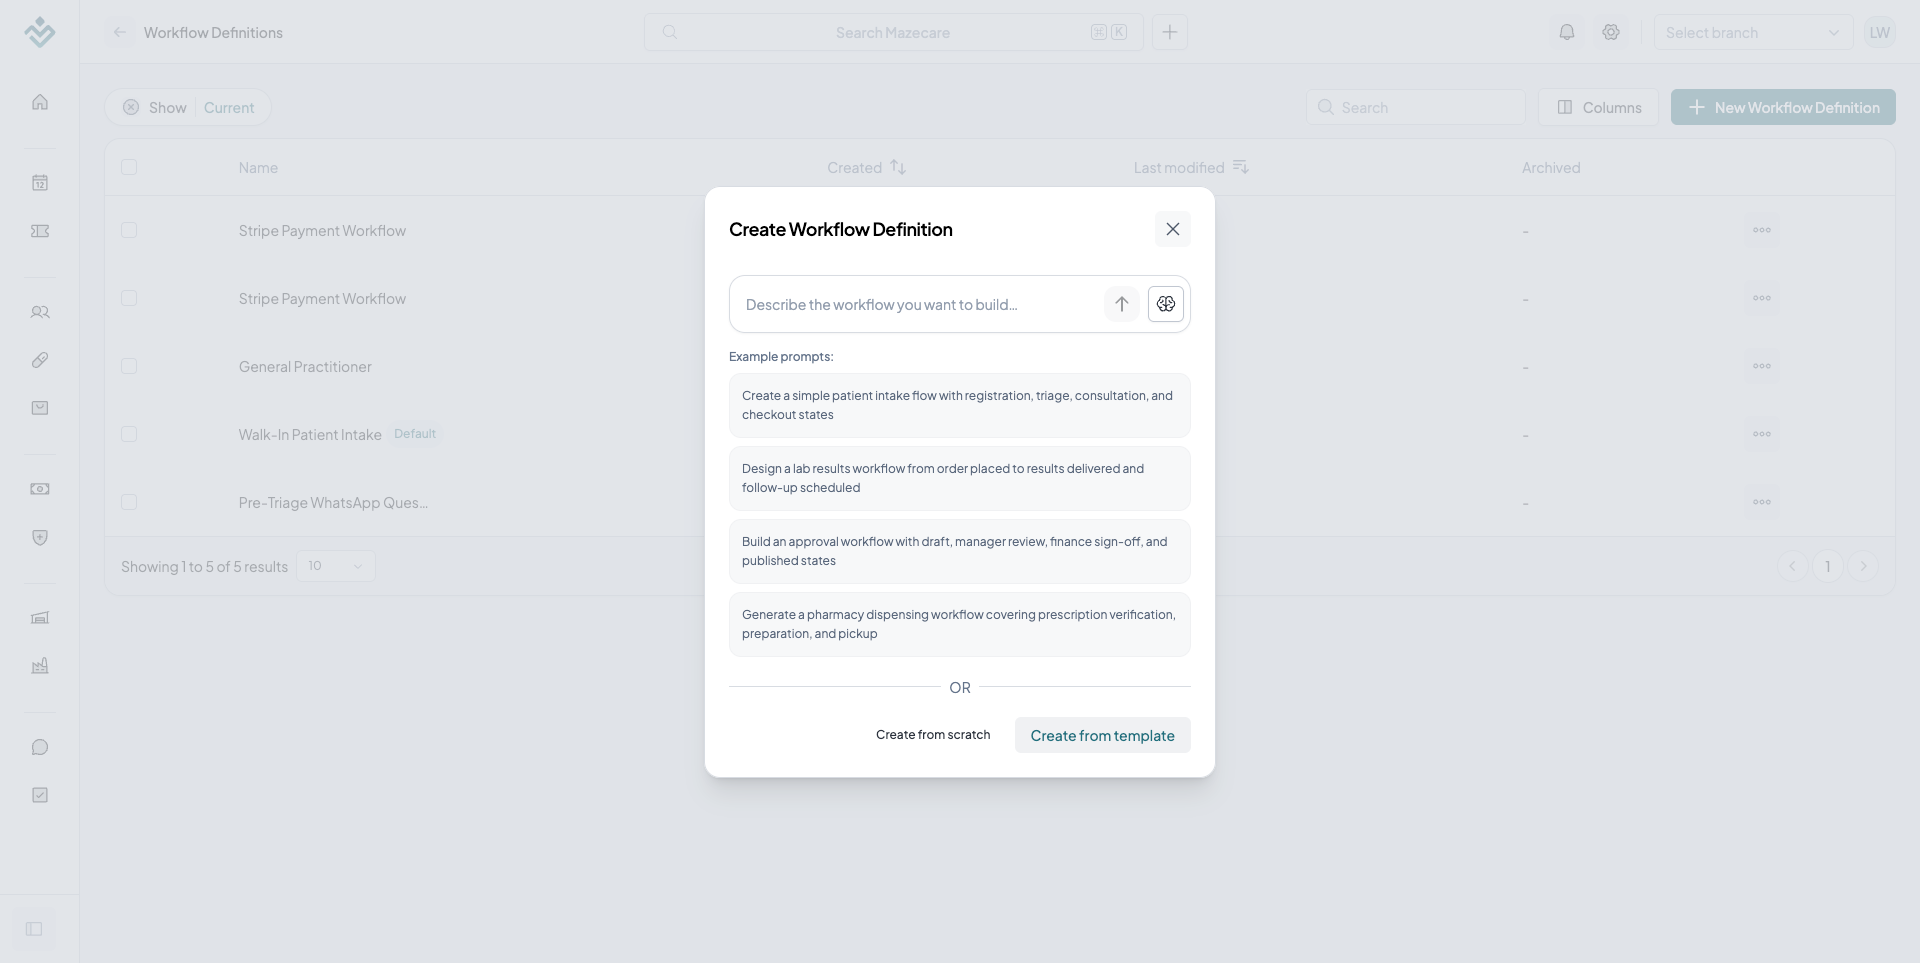
Step 3: Initiate the Template Flow
Inside the modal, you can type an AI prompt, create from scratch, or choose a template:
- Locate the options at the bottom of the modal.
- Click the Create from template button.
Step 4: Select Your Workflow Template
After choosing the template path, you will enter a two-step configuration wizard. The first step is selecting the appropriate blueprint:
- Review the list of available pre-built templates (such as General Practitioner, Walk-in Patient Intake, Stripe Online Payment, etc.).
- Click the radio button next to the template that best fits your clinic's needs.
- Click the Continue with template button in the bottom-right corner to proceed to the next step.
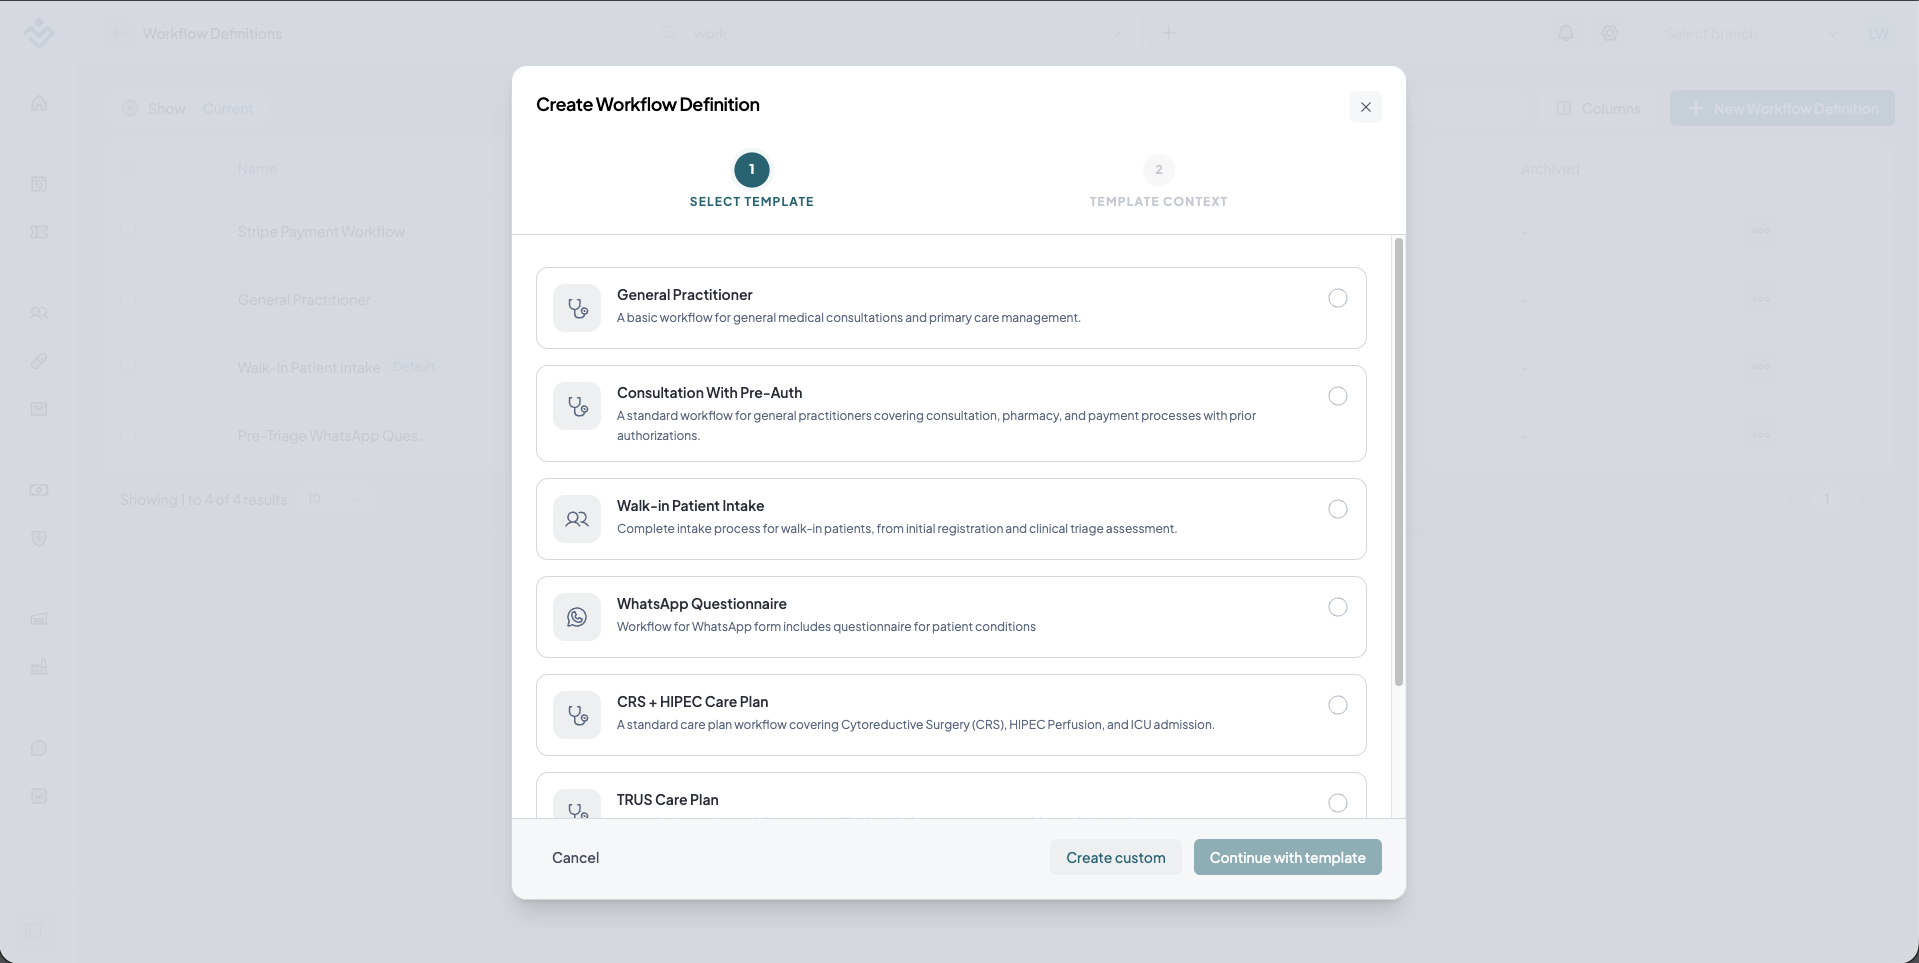
Step 5: Configure Template Context Variables
Templates require specific variables (credentials, entity IDs, and keys) to connect and automate your clinic's operational pipelines:
- In the Template Context step, fill in the required configurations displayed in the form (for example, if configuring a Stripe Online Paymenttemplate):
- Fill required fields: Fill in all the required fields in the form.
- Read the Template Context Guide panel on the right if you need clarification on any specific field.
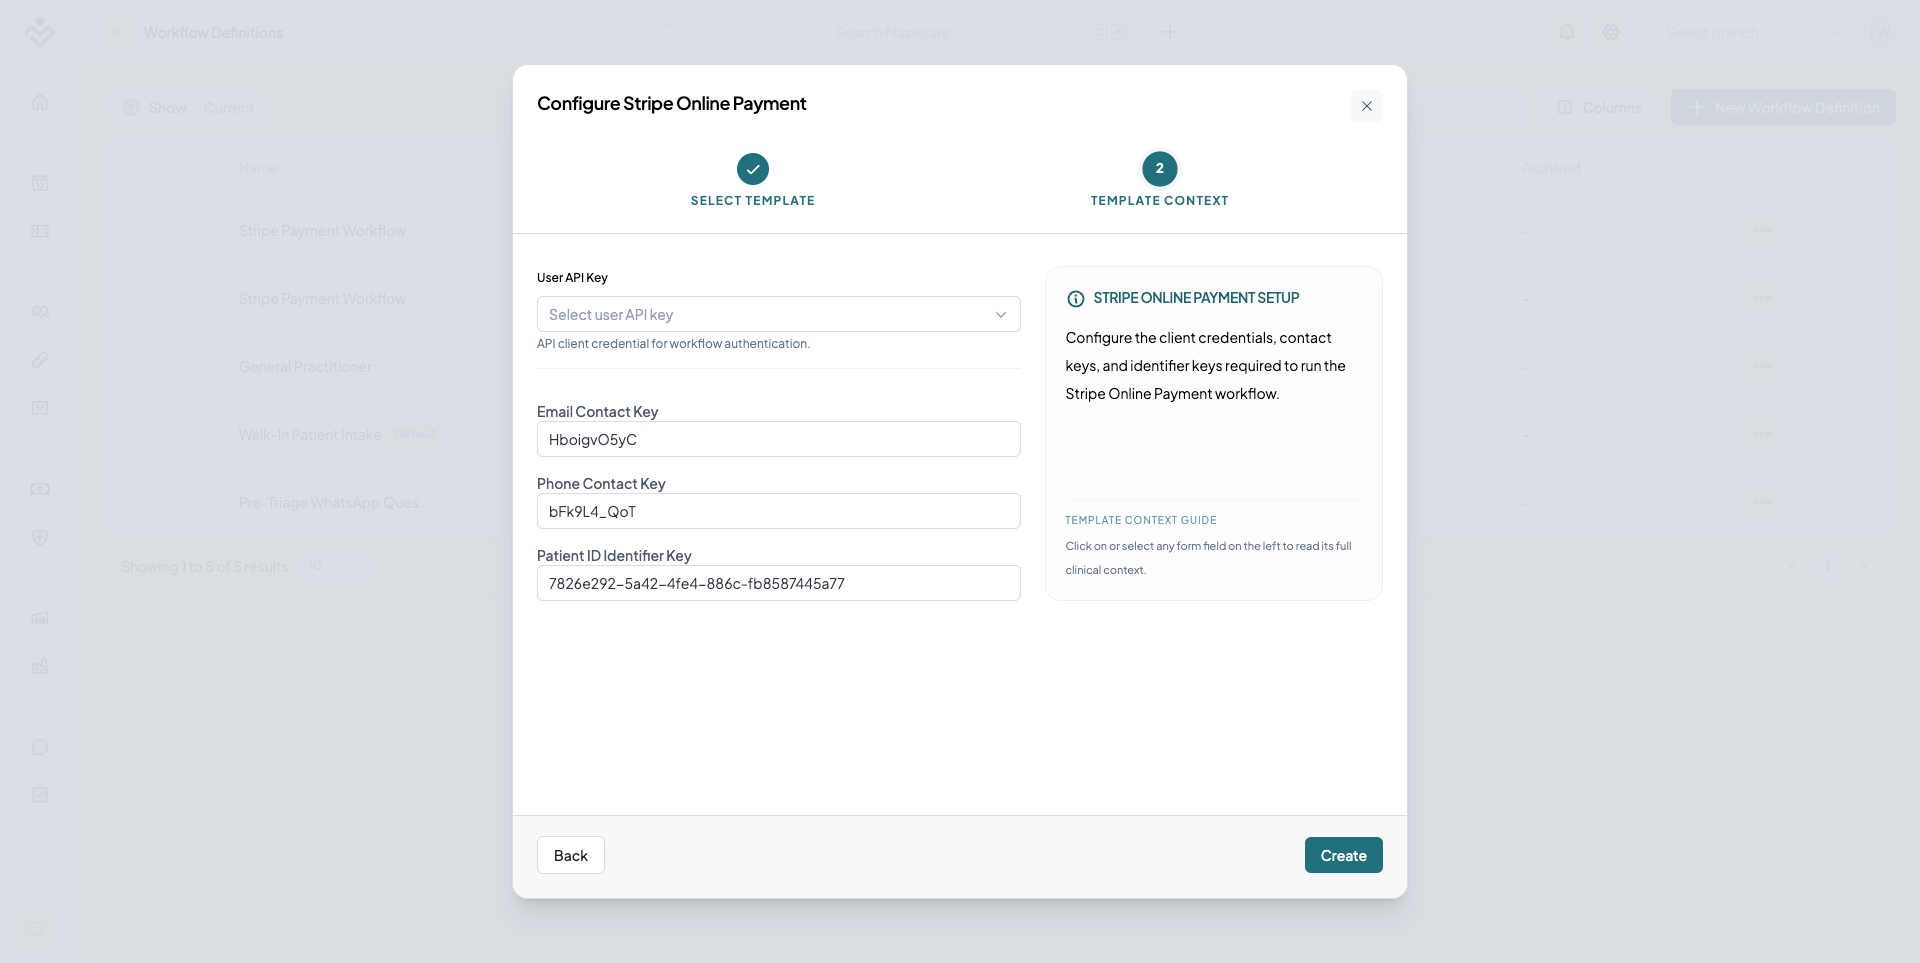
Step 6: Initialize and Save Your Workflow
- Once all the required context data has been entered, click the Create button in the bottom-right corner of the modal.
- The system will auto-generate the visual nodes, transitions, and HTTP hooks, then open the new workflow in the visual editor canvas.
- Your template-derived workflow is now successfully created and ready to be bound to your clinic's Episodes of Care!
Workflow Setup
Configure clinical care pipelines using visual state machines that govern how Episodes of Care progress from intake to discharge.
Server Environments
Learn how to connect to Mazecare servers depending on your region. Toggle the switcher below to update documentation endpoints dynamically.